

How To Install Ssl Certificate In Plesk Panel Godaddy

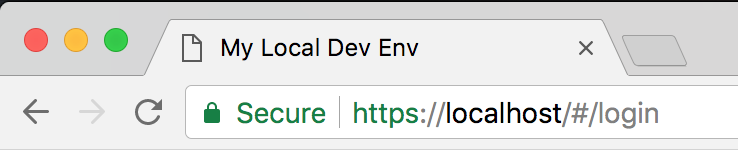
Almost any website you visit today is protected by HTTPS. If yours isn't yet, it should be. Securing your server with HTTPS also means that you can't send requests to this server from ane that isn't protected by HTTPS. This poses a problem for developers who use a local development environment because all of them run on http://localhost out-of-the-box.
At the startup I'grand a part of, we decided to secure our AWS Elastic Load Balancer endpoints with HTTPS as function of a move to enhance security. I ran into a situation where my local development environment's requests to the server started getting rejected.
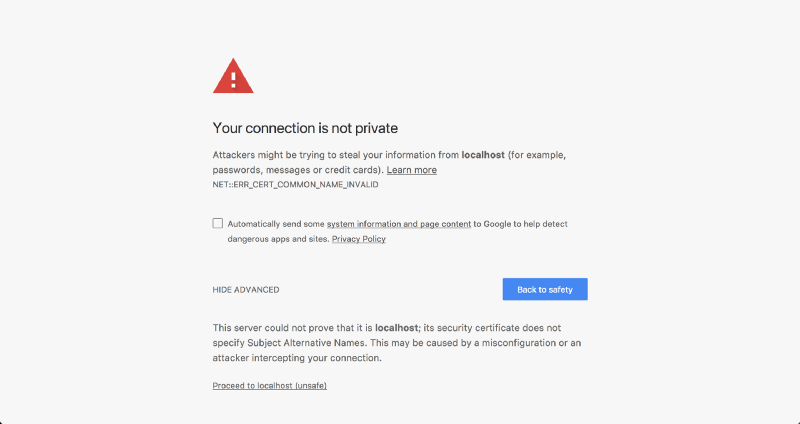
A quick Google search later, I found several articles like this, this or this one with detailed instructions on how I could implement HTTPS on localhost. None of these instructions seemed to work fifty-fifty afterward I followed them religiously. Chrome e'er threw a Internet::ERR_CERT_COMMON_NAME_INVALID error at me.
The problem
All the detailed instructions I had constitute were right for the fourth dimension they were written. Not anymore.
Later a ton of Googling, I discovered that the reason for my local document getting rejected was that Chrome had deprecated support for commonName matching in certificates, in effect, requiring a subjectAltName since January 2022.
The solution
Nosotros'll be using OpenSSL to generate all of our certificates.
Step 1: Root SSL certificate
The first step is to create a Root Secure Sockets Layer (SSL) certificate. This root document can so be used to sign any number of certificates you might generate for individual domains. If you aren't familiar with the SSL ecosystem, this article from DNSimple does a good job of introducing Root SSL certificates.
Generate a RSA-2048 key and salvage information technology to a file rootCA.cardinal. This file will exist used as the key to generate the Root SSL certificate. You will exist prompted for a laissez passer phrase which you'll need to enter each time you lot use this particular central to generate a certificate.
openssl genrsa -des3 -out rootCA.central 2048 You can use the key you generated to create a new Root SSL certificate. Salve it to a file namedrootCA.pem. This certificate will have a validity of 1,024 days. Feel free to modify it to whatsoever number of days you want. Y'all'll also exist prompted for other optional data.
openssl req -x509 -new -nodes -key rootCA.key -sha256 -days 1024 -out rootCA.pem 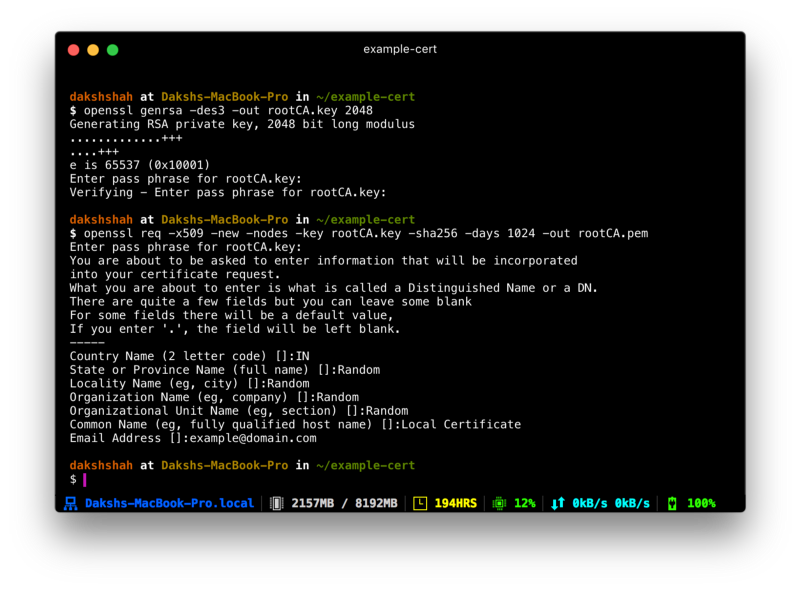
Step 2: Trust the root SSL certificate
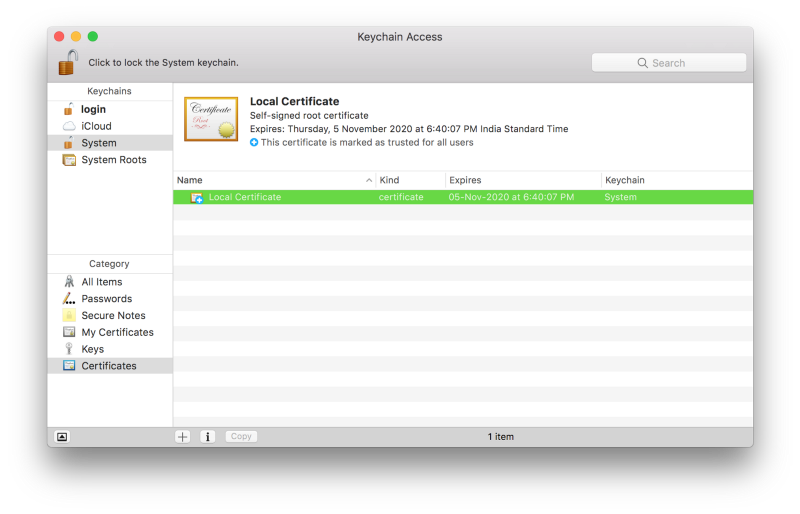
Before yous can use the newly created Root SSL certificate to showtime issuing domain certificates, there's one more pace. You need to to tell your Mac to trust your root certificate so all individual certificates issued by it are also trusted.
Open up Keychain Admission on your Mac and go to the Certificates category in your Arrangement keychain. Once at that place, import the rootCA.pem using File > Import Items. Double click the imported certificate and change the "When using this document:" dropdown to Ever Trust in the Trust section.
Your document should look something like this inside Keychain Access if you've correctly followed the instructions till now.
Step 2: Domain SSL document
The root SSL certificate tin at present be used to issue a certificate specifically for your local development environment located at localhost.
Create a new OpenSSL configuration file server.csr.cnf so you tin can import these settings when creating a document instead of entering them on the command line.
[req] default_bits = 2048 prompt = no default_md = sha256 distinguished_name = dn [dn] C=US ST=RandomState L=RandomCity O=RandomOrganization OU=RandomOrganizationUnit emailAddress=hullo@example.com CN = localhost Create a v3.ext file in society to create a X509 v3 document. Notice how we're specifying subjectAltName here.
authorityKeyIdentifier=keyid,issuer basicConstraints=CA:FALSE keyUsage = digitalSignature, nonRepudiation, keyEncipherment, dataEncipherment subjectAltName = @alt_names [alt_names] DNS.1 = localhost Create a certificate central for localhost using the configuration settings stored in server.csr.cnf. This key is stored in server.key.
openssl req -new -sha256 -nodes -out server.csr -newkey rsa:2048 -keyout server.key -config <( cat server.csr.cnf ) A certificate signing request is issued via the root SSL certificate we created before to create a domain certificate for localhost. The output is a document file chosen server.crt.
openssl x509 -req -in server.csr -CA rootCA.pem -CAkey rootCA.fundamental -CAcreateserial -out server.crt -days 500 -sha256 -extfile v3.ext 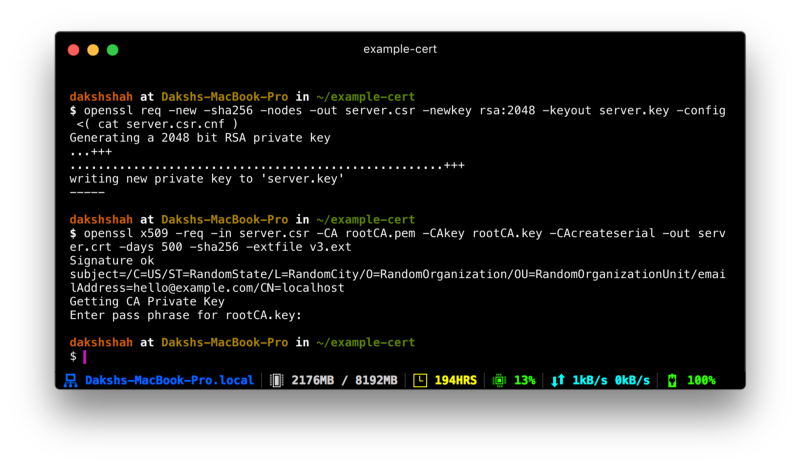
Use your new SSL certificate
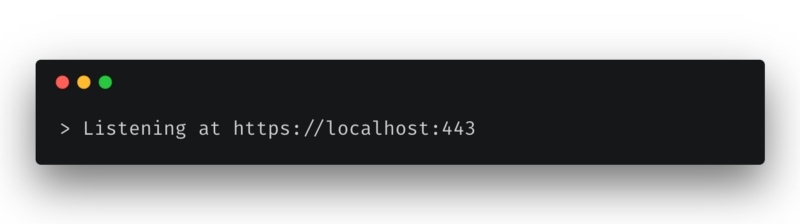
You're now ready to secure your localhost with HTTPS. Motility the server.key and server.crt files to an attainable location on your server and include them when starting your server.
In an Express app written in Node.js, here's how you would practise it. Brand certain y'all do this only for your local environment. Do not use this in production.
I promise you establish this tutorial useful. If y'all're not comfy with running the commands given hither by yourself, I've created a prepare of handy scripts y'all can run chop-chop to generate the certificates for you. More details can be found on the GitHub repo.
I love helping boyfriend web developers. Follow me on Twitter and permit me know if y'all have any suggestions or feedback. If you'd similar to show your appreciation towards any of the piece of work I've done, be information technology a web log postal service, an open source project or simply a funny tweet, yous tin buy me a loving cup of java.
Acquire to code for free. freeCodeCamp's open source curriculum has helped more than twoscore,000 people become jobs as developers. Get started

Source: https://www.freecodecamp.org/news/how-to-get-https-working-on-your-local-development-environment-in-5-minutes-7af615770eec/
Posted by: smithdesichall74.blogspot.com
0 Response to "How To Install Ssl Certificate In Plesk Panel Godaddy"
Post a Comment